

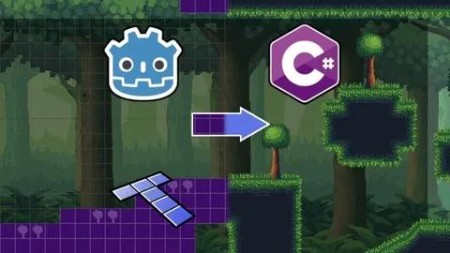
Automate Level Design With Tiled Automapping & Godot 4.3 C#
Published 11/2024
MP4 | Video: h264, 1920×1080 | Audio: AAC, 44.1 KHz
Learn Everything You Need to Know in Order to Automate and Speed Up Your Level Design with Tiled and Godot 4.3
What you’ll learn
Setting up the Godot 4.3 C# project
Creating tile sets in tiled
Setting up collision shapes for Tiled tile sets
Settting up Automapping with Tiled
How to use NoOverlappingOutput to make sure that larger objects will not overlap on the same layer
How to Automap larger objects without them being overdrawn when using multiple layers
Setting up plugin to import maps from Tiled into the Godot 4.3 game engine
Setting up parallax scrolling backgrounds in Godot 4.3
Animating a character with the AnimatedSprite2D node
How to implement the class based state pattern to control the player
Setting up and configuring the Camera2D node for a better playing experience
Making the character walk properly on slopes
Requirements
A PC / Mac
Godot 4.3 .NET
Some prior experience with the Godot game engine
Tiled editor
Description
Overview
Section 1: Introduction
Lecture 1 Introduction
Lecture 2 Course Structure
Section 2: Setting up Godot 4.3 .NET with vscode as editor & debugger and .NET8 as compiler
Lecture 3 Setup Godot 4.3 .NET with vscode and .NET8 in Windows
Lecture 4 Setup Godot 4.3 .NET with vscode and .NET8 in Ubuntu Linux
Section 3: Setting up The Godot 4.3 Project To Load In The Tiled Maps
Lecture 5 Setting up Folders & Installing the plugin to the Godot 4.3 project
Section 4: Downloading and Installing the Tiled editor
Lecture 6 Downloading and Installing Tiled for Windows
Lecture 7 Downloading and Installing Tiled for Ubuntu Linux
Section 5: Setting Up Tile-sets in The Tiled Editor
Lecture 8 Setting Up TileSets and Tile Collisions In The Tiled Editor
Section 6: Creating And Importing A Tiled Level Into The Godot Project
Lecture 9 Creating and importing a simple level to the Godot 4.3 project
Section 7: Setting Up Automapping For The Map
Lecture 10 Setting up the rules map
Lecture 11 Adding top, bottom, left and right tile rules to the automapping
Lecture 12 Adding corner tile rules to the automapping
Lecture 13 Adding extra rules for the corner tiles
Lecture 16 Adding the 45 degree slope rules to the automapping
Lecture 17 Adding the 22.5 degree slope rules to the automapping
Section 8: Setting up Automapping for a more simple tile-set
Lecture 24 Setting upp automapping for the regular tiles
Lecture 25 Setting up automapping for the slopes
Section 9: Adding a parallax scrolling background to the game
Lecture 26 Adding the parallax scrolling background to the game
Section 10: Importing the player character into the game using The AnimatedSprite2D node
Lecture 27 Importing the player into the game
Section 11: Controlling the player using a state machine
Lecture 28 The class based state pattern
Section 12: Adding the Camera2D and Parallax scrolling background into the game
Lecture 32 Adding the Camera2D and parallax scrolling background into the game
Lecture 33 Limiting Camera2D to the game world
Section 13: Download complete project
Lecture 34 Full project – Grab it here!
Section 14: Final section
Lecture 35 Congratulations on completing the course
Aspiring indie game developers,Game developers going from Unity -> Godot,Beginner+ game developers which have some Godot game engine and C# experience.

RapidGator
https://www.keeplinks.org/p27/69e7c1f3d1ae6
NitroFlare
https://www.keeplinks.org/p27/69e7c270341fe
UsersDrive